Magic Mushroom
How to Grow Psilocybin Mushrooms at Home
More people are deciding to grow their own magic mushrooms, or shrooms, at home. That gives them a reliable supply no matter what time of year it is. It also reduces the risk of misidentifying shrooms. It can be a fun and inexpensive hobby, as well.
While it can be tempting to start with a growing kit, starting from scratch can work just as well. The kits come with a mycelium substrate, which is the material under the mushrooms. But you can create your own, which can also reduce the risk of contamination. This is a great way to learn more about shrooms, too.
Getting Started
You can likely find everything you need, although spore syringes may be hard to obtain. These have spores in them, and you will use this to “plant” them in your substrate. You should do your research to find a good supplier.
Choosing the Right Variety
When you learn how to grow your shrooms, you should decide on a strain and species. Psilocybin cubensis and Golden Teacher are a few common types for beginner growers. They are not as potent, but they are often more forgiving.

Gathering Your Tools
You will need several things, which you can get from a supplier. They include:
- Spore Syringe
- Vermiculite
- Brown Rice Flour
- Water
- 12 250-Millilitre Canning Jars with Lids
- Measuring Cup
- Small Nail and Hammer
- Strainer
- Mixing Bowl
- Several Paper Towels
- Tinfoil
- Strainer
- Misting Bottle
- Drill
- Micropore Tape
- Clear Box
- Perlite
- Sanitation Supplies
First, you will prepare the substrate with vermiculite, rice flour, and water. Next, you will divide it among the jars and add the spores. Then, you will wait for the mycelia to begin to grow. This consists of filaments that support the shrooms. After a few weeks, you will move the substrates, also known as cakes, to a chamber where you will wait for the shrooms to grow.
Remember that hygiene is vital. Mould and bacteria can easily grow in poor conditions, which can contaminate the shrooms and prevent them from growing.
Preparation
Punch four holes in each lid. Then, add 32 grams of water and 85 grams of vermiculite to your mixing bowl. Drain any extra water. Add 32 grams of brown rice flour and mix well.
When you fill the jars, do not pack them very tightly. Fill each one about 1¼ centimetres from the top and then sterilize it. Add some dry vermiculite to the top.
Screw the lids on and cover them with foil. Then, put the paper towels in your cooking pot and put the jars on top. Fill the pot with water until it comes halfway up the jars. Slowly boil them, keeping the jars upright. Put the lids on and allow them to steam for about half an hour. Let them sit overnight to cool to room temperature.
Inoculation
Now, use a flame to sterilize the needle of your syringe. Take the foil off of each jar and stick the syringe deeply through the hole. Inject some of the solution in each of the four holes in the lid. Use the micropore tape to cover each hole. Sterilize your needle after each of the jars.
Colonization
Now, it is time to wait for the mycelia to grow. Place them in a dark, room temperature area. After one to two weeks, white mycelia will appear. Make sure you look for contamination signs, like strange smells or colours. Dispose of any jars quickly. Some containments can be deadly.
You should have several colonized jars if everything has gone well. Allow them to sit for another week, so the mycelia can become stronger.

Making the Growth Chamber
Take a plastic storage container so you can drill holes over the lid, base, and sides. Put a base under each corner so air can flow under the box. Now, it is time to add the perlite. Put it in the strainer and then under cold water. Let it drain and then add it to the chamber’s base. Continue doing this until the layer is several centimetres deep.
Take out the dry vermiculite from each of your jars and turn each jar upside down to remove the cakes. Then, put them in water and allow them to soak overnight. Roll them in vermiculite to keep them moist.
Now, place each cake on tinfoil in the chamber. Mist everything with your spray bottle and put the lid on the chamber.
You will need to mist the growth chamber several times a day, so it stays humid. But you want to avoid soaking the cakes. To increase airflow, fan it with the lid. The cakes do not need direct light.
Harvesting Shrooms
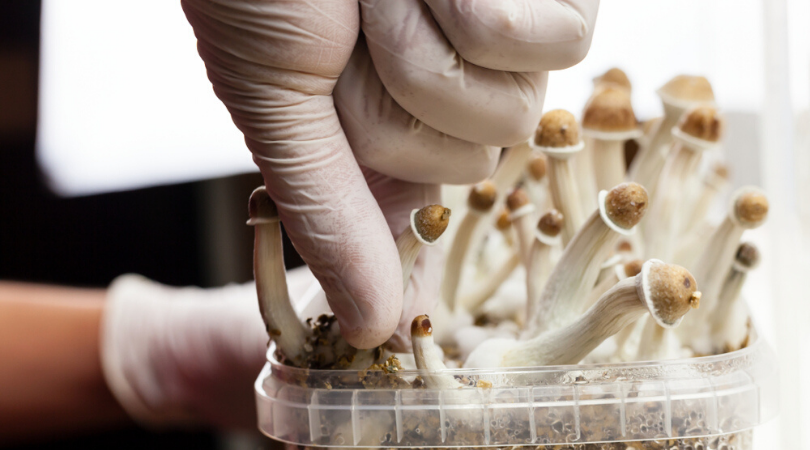
You will notice small white bumps that will be ready to harvest in five to 12 days. Then, cut them close to their base. You want to get them before they are mature, so they do not lose their potency.
If you want to use them for micro-doses or save them for another time, you will need to dry them. You can leave them on a piece of paper near a fan. But you still need them to be “cracker dry,” which means they snap when bending them.
It is better to use a dehydrator if you have one. That way, they will not become less potent. You can also use a desiccant, which removes extra moisture. Place this in an airtight container and put a wire rack on top to prevent the shrooms from touching it. Then, put the shrooms on the rack and seal the container.
After drying, you can put them in a plastic storage bag, which will keep out the air. The freezer is a good place to keep them.
Closing Thoughts
Remember that you can reuse your cakes after the first harvest. Growing your own magic shrooms is a fun learning experience. With the right precautions, you will stay safe and be well on your way to a very satisfying trip.


